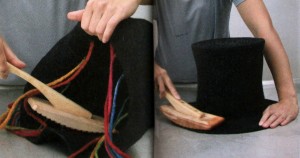
Just wanted to say that I had a wonderful day selling at the market.
We started at 12.00 and finished at 19.00 and I rarely had time to spare, at the end almost lost my voice! This is my stall minded by my next stall neighbor.
The dotted scarves sold very well today. Has anybody noticed yesterdays hat? It was still slightly damp...
I have taken the three little wonderful mice to the stall and they worked very well to attract the yummy mums!
A happy customer wearing my scarf!
Other stalls offered hand made postcards: (Sadie Cramer) (visit www.smartstudios.ie)
felted wool (but knitted) (Hanora -K - Designs)
Lovely button jewelery and bits and bobs (Ruth from Nice Day Designs! http://www.facebook.com/nicedaydesigns)
After all that selling I gave a little 2 hour workshop to Ania.
She has been using Icelandic wool to make a lovely sculpted vessel.
There is some more pics I have taken during the process.
At the end of the day she was really pleased with the outcome. The vessel is going to be used to hold pens in the office at work. She also tried to make a fridge magnet but this time we tried to make a shape of a tree. I think that hands are the biggest gift of all, that we feltmakers have.
Labels
- felt (1)
- front back (1)
- fulling (2)
- hat (1)
- hat forms (2)
- hatmaking (1)
- hats (1)
- Here Dorie is preparing her special magic leaf dyeing bundle (1)
- Laying out horst style jacket (1)
- The most innovative feltmaker as of now (1)
- tools (2)
- wash board (1)
Thursday, July 29, 2010
Wednesday, July 28, 2010
New hat and I am participating at Artisans Craft Fair in Limerick tomorrow!
So as promised I have been trying to learn how to make hat my own way.
I have made a tubular structure which has not at all resembled the hat structure I have ended up with.
In fact I have had not a clue what final shape it is going to be!
So after initial felting stage I have packed the hat form from wollknoll and the felt in tightly closed pantyhose and off in to the washing machine.
The hat form has not been broken at all and the hat has emerged somehow felted from the machine.
then I have tried to play with the form and shape so at the very beginning the hat has looked as if it had a lot of ruffled pleats or indeed it looked as if it was a scrunched up piece of paper.
I have put the hat block and the felt to steam for a few minutes and this is where the disaster struck. My newly purchased block form has changed its shape slightly. Now a lesson use a boiling kettle instead to soften your piece.
So one thing for making pleated hats is to full the hat to a stage when it is pretty much closer to be done and then repeatedly steam it and pinch and shape in between.
This is what I have learned throughout this experiment.
finally the final image:
 I love the outcome and there is more to come!
I have made a tubular structure which has not at all resembled the hat structure I have ended up with.
In fact I have had not a clue what final shape it is going to be!
So after initial felting stage I have packed the hat form from wollknoll and the felt in tightly closed pantyhose and off in to the washing machine.
The hat form has not been broken at all and the hat has emerged somehow felted from the machine.
then I have tried to play with the form and shape so at the very beginning the hat has looked as if it had a lot of ruffled pleats or indeed it looked as if it was a scrunched up piece of paper.
I have put the hat block and the felt to steam for a few minutes and this is where the disaster struck. My newly purchased block form has changed its shape slightly. Now a lesson use a boiling kettle instead to soften your piece.
So one thing for making pleated hats is to full the hat to a stage when it is pretty much closer to be done and then repeatedly steam it and pinch and shape in between.
This is what I have learned throughout this experiment.
finally the final image:
 I love the outcome and there is more to come!
Publish Post
Thursday, July 22, 2010
Hat forms and hatmaking part 1

Hats and forms. My journey with hatmaking has just started. So if anybody has a comment or sugestion or indeed a correction to what I have been saying please comment freely!
First of all the hat form I have purchased from Wollknoll (price 32 euro)

- bit pricey for the material used (it is a thick form of plastic similar to the one used in plastic fuzzy drinks bottles.

- the stand that comes with a hat is poorly made from playwood, but also screws can come out (in wet environment I assume that plywood coud soak up all water, but note I have not checked that)

The form could be prone to cracking if it is pushed on the wooden stand. When I have ordered my hat I had received a cracked form and apparently it happened in transport. So I assume that this hat form is not right great if one wants to finish their hat or creases in washing machine. So at the moment the hat form is out.
WinghamWoolwork hat (price 13 pounds)
 - sturdy enforced styrofoam finish. If you have purchased your shoe lasts from Wingham this styrofoam is even sturdier.
 - very handy handle, useful if you are dipping your hat in hot water or dye (sturdy)
 - interesting surface design! These little dots are designed to hold the the hat in place. Very useful as there is no need to use hat pins or rubber bands to secure the hat in place.
At the moment I could recommend Wingham's hat forms. I have no clue whether you can put it in the washing machine etc but the price is very encouraging and I will be definitely buying more. Note. this review is independent from the influence of the owner of Wingham, in fact some of you may have noticed a few incidents and dissapointments I have had with Wingham. However this time the hat is a winner!
Yesterday night I was finishing the brooches for the craft fair, the candles were burning in the kitchen and my friend was finishing her essay (while I was helping out in terms of translation).
I have made this hat using clamp resist and leftower dyes. I have dipped it repeatedly in hot and cold water to secure the design. Then i have added yellow overtones to it and left to dry. I am thinking about using shellac to secure and strengthen it. Have you got any particular good brands in mind?

Tuesday, July 20, 2010
Today has been a manic day:
I have returned from Cork and earlier have been in Galway where we have been brainstoriming about the ways of expanding the business in the internet using social networking tools!
Check out Jagienka's blog to get the details of that meeting!
http://2knitornot2knit.blogspot.com/2010/07/it-is-her-fault.html
I love one sentence : she said that it is my fault that she can't stop making felted flowers, especially tripple deckers! The truth is that I am very passionate about felt and I cant stop myself from telling people about it and teaching them about it!
BTw. I am going to be heading to a seminar about marketing using social networking sites - I will share any new info here.
I have updated my shop and have been photographing my recent work. Here is one of the scarves;
 I have sold quite a few silk laps so check out my shop for newest batch arriving on Thursday!
I have made some lovely fridge magnets. What do you think? (Btw this is the correct way of displaying them!)

:)
I have returned from Cork and earlier have been in Galway where we have been brainstoriming about the ways of expanding the business in the internet using social networking tools!
Check out Jagienka's blog to get the details of that meeting!
http://2knitornot2knit.blogspot.com/2010/07/it-is-her-fault.html
I love one sentence : she said that it is my fault that she can't stop making felted flowers, especially tripple deckers! The truth is that I am very passionate about felt and I cant stop myself from telling people about it and teaching them about it!
BTw. I am going to be heading to a seminar about marketing using social networking sites - I will share any new info here.
I have updated my shop and have been photographing my recent work. Here is one of the scarves;
 I have sold quite a few silk laps so check out my shop for newest batch arriving on Thursday!
I have made some lovely fridge magnets. What do you think? (Btw this is the correct way of displaying them!)

:)
Sunday, July 18, 2010
Micro feltmaking and spinning gathering in Galway
Myself, Ewa (http://craftobssesion.blogspot.com/) and Jagienka (http://2knitornot2knit.blogspot.com/) have gathered together to do some feltmaking and spinning.
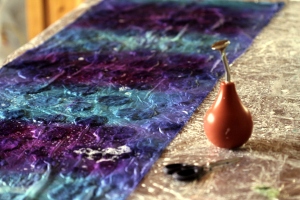
Yesterday I have had another batch of 5 scarves which are to be sold at Limerick's Milk Market the following Sunday. I have dyed hand rolled silks and have felted some dots onto it. This is a photo of the process:
Today I have been finishing felted pod brooches:
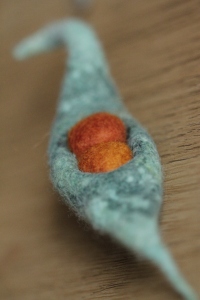
I love the balls, the colours came out very well. These brooches have a very organic shape and could have some sexual connotations :). So hopefully they would sell. It takes time to attach the pin to it.
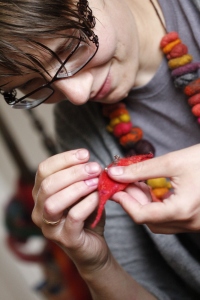
In limerick though there was another meeting of the Irish Etsy craft team. Good luck girls and have a lovely night out!
Yesterday I have had another batch of 5 scarves which are to be sold at Limerick's Milk Market the following Sunday. I have dyed hand rolled silks and have felted some dots onto it. This is a photo of the process:

Today I have been finishing felted pod brooches:

I love the balls, the colours came out very well. These brooches have a very organic shape and could have some sexual connotations :). So hopefully they would sell. It takes time to attach the pin to it.

In limerick though there was another meeting of the Irish Etsy craft team. Good luck girls and have a lovely night out!
Saturday, July 17, 2010
Silk laps in use and processing
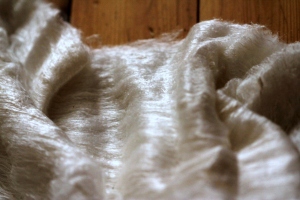
Working with silk laps:
first time I have bought my silk laps I cried, because I couldnt separate the sheets of silk! My skin was too rough and it pulled little strands of silk every time I wanted my hands to be free of silks! To separate the silk laps you should:
- peel off any dead skin from your hands or do a little feltmaking session using olive oil soap!
- rub a side of the silk lap to reveal the layers of silk
- separate delicately a thin layer and consistently pull it from main lap.
To dye silk laps:
you should pre soak the laps in water and vinegar acid, squeeze the excess of water well and lay it on plastic cling film. Apply your dyes and wrap up well. Steam for 15 minutes. Rinse and stretch to dry.
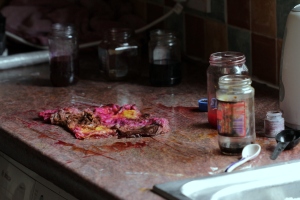
please note that when pulling the silk from the lap it becomes very fluffy, so when laying the silk lap on your felting table you should spray the surface with soapy water.
Silk laps can be shaped and pulled so they present various possibilites for making lovely silk inlays. They are way faster to lay and produce interesting yet even results in the products. Finally silk laps support wool so the use of silk laps in feltmaking allows for faster bonding and fulling of the piece (approx 20 min for the whole process without using the sander)!
The result?
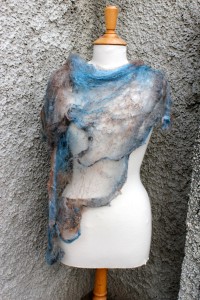 and
and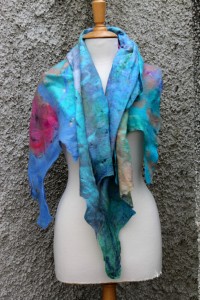 BTW: I supply a range of silk laps both undyed and dyed. My silk laps are made from the best silk (grade A Mulberry) for best shine and quality.
Friday, July 16, 2010
Ashford wash board versus plastic rugged mat
At the early stages of my feltmaking quest I was using a corrugated part of my kitchen sink to full my pieces. It was useful however the size of the ridges was too large for rolling felted dreads or shaping felted slippers. I have used it mostly for rolling scarf bundles. At that stage the bundle was not wrapped in plastic and it was rolled directly on the sink.
In Ireland, and LImerick in particular I have been unable to purchase a wash board second hand, neither in the antique shop or online. So I have got an Ashford wash board.
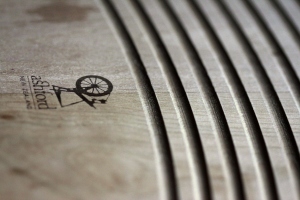
note that grooves are well finished and do not disturb the fibers at early stages
 The board consists of two wooden panels joined seamlessly in the middle. The ridges are not too deep, and are shaped so the water is drained during the process. The size of the grooves is approx:6 millimeters, the size of the board: (46 by 23 cm).
What I consider as a plus in terms of Ashford:
- well finished (sanded) grooves
- the quality of wood, while it soaks up the water, the water itself does does not affect the structure of the board
- the wood seems to be pre treated with something so there is no need for oiling it
- at the back of the panel there is a narrow wooden board which acts as a hinge. So it blocks the board from moving.
Negative: the price, at 35 pounds it is rather dear, however when buying standard wash board one might purchase something that does not fit the purpose so well (for instance the rigdes are risen in some boards which does not allow to evenly full the larger pieces). I suppose glass ridges and grooves might be little bitt too slippery as well (btw. has anybody got any experiences with regards to use of old wash boards in feltmaking?).
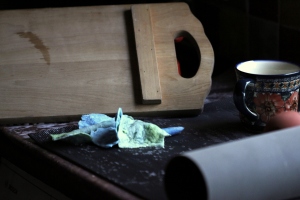 I have also purchased a plastic mat for the same purpose. It is used for rolling scarf bundles (at early and later fulling stages). The grooves are rather small: (1-2 millimeters). The overall size is 50 by 80 cm. On this one I prefer to make my felted dreads and I tend to use it for rolling scarf bundles.
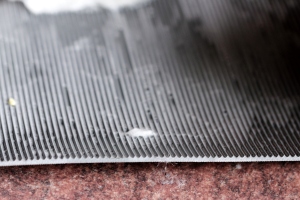 In the case of flower or slippers - I prefer ashford. I suppose the serrated rubber mat is less likely to disturb surface of felt when it is rubbed.
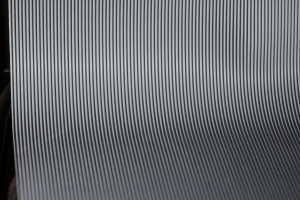
What is interesting here is that sanding on this surface results in permanent transfer of the shape of the grooves onto a felted piece.
Have you got any favorite fulling tools yourselves?
In Ireland, and LImerick in particular I have been unable to purchase a wash board second hand, neither in the antique shop or online. So I have got an Ashford wash board.

note that grooves are well finished and do not disturb the fibers at early stages
 The board consists of two wooden panels joined seamlessly in the middle. The ridges are not too deep, and are shaped so the water is drained during the process. The size of the grooves is approx:6 millimeters, the size of the board: (46 by 23 cm).
What I consider as a plus in terms of Ashford:
- well finished (sanded) grooves
- the quality of wood, while it soaks up the water, the water itself does does not affect the structure of the board
- the wood seems to be pre treated with something so there is no need for oiling it
- at the back of the panel there is a narrow wooden board which acts as a hinge. So it blocks the board from moving.
Negative: the price, at 35 pounds it is rather dear, however when buying standard wash board one might purchase something that does not fit the purpose so well (for instance the rigdes are risen in some boards which does not allow to evenly full the larger pieces). I suppose glass ridges and grooves might be little bitt too slippery as well (btw. has anybody got any experiences with regards to use of old wash boards in feltmaking?).
 I have also purchased a plastic mat for the same purpose. It is used for rolling scarf bundles (at early and later fulling stages). The grooves are rather small: (1-2 millimeters). The overall size is 50 by 80 cm. On this one I prefer to make my felted dreads and I tend to use it for rolling scarf bundles.
 In the case of flower or slippers - I prefer ashford. I suppose the serrated rubber mat is less likely to disturb surface of felt when it is rubbed.
What is interesting here is that sanding on this surface results in permanent transfer of the shape of the grooves onto a felted piece.
Have you got any favorite fulling tools yourselves?
Thursday, July 15, 2010
My new Feltmaking Tools
For some time I was intending to buy a smaller version of felting board. But it was never a necessity rather an additional gadget, so I have never acted upon the issue of what I call a 'mini felter'. Up untill, I flicked through a book by Anette Quentin-Stoll, called Filz-Play, or Filz Spiel. This is what I saw there:

Anette herself is a very talented feltmaker. Her first book, Filz - Spiel, in a precise and clean way (very nice photography) presents a set of very simple ideas that allow to built a woolen world of tactile wonders. For instance her tactile play mat (see wonderful post by Nicola Brown, http://clasheen.wordpress.com/2009/03/25/the-completed-tactile-felt-play-mat/ contained various pleated shapes, just like this one:
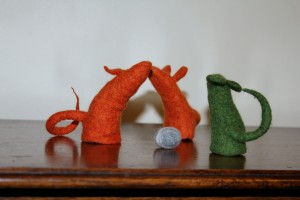
 I loved the idea of felted finger puppets which she has presented in the book: here is my recreation of it. Her puppets are standing straight, whilst mine are sligtly bent because I have kept the resist up to the last minute of fulling stage.
 This book offered wonderful inspiration but limited explanation how to!
So it has very much driven me to try to figure out the ways in which such pleated shapes can be inserted into felted hats for example. The next book released last year, called Filz Experiment (available in German only) provides all answers I was looking for.
Consider this hat:

the basic shape is semi felted and then tied in as in shibori dyeing. A very nifty technique, which allows getting lasting results without too much hassle. Such tied, prefelted hat can be easilly thrown into the washing machine for 1 or 2 minutes to speed up the process. The newest book presents these techniques, and much much more. Again, a masterpiece in terms of editing and quality of the images. Unlike other books on feltmaking, usually called 34 craft project in felt (etc,.. I am referring here to a specific type of genre in general) - and which reproduce one image up to 4 times in the same book; which relentlessly describe what is obvious and which present underfelted accessories, this book is proper and certainly worth the price. Shame it is not translated into English but you can figure out the stuff for yourself from pictures. If you are going to ask me which ones to buy I would say both, but otherwise buy the second one.
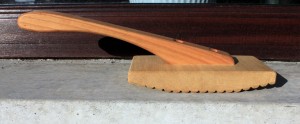
Annette was basically using this nifty tool to finish hat brim. This has inspired me to start my journey into hatmaking (about which I will write soon!). The tool is nicely finished, very well polished and the ridges are smooth. The only downside is the lack of a hole to hang the tool in the workshop. The surface with the ridges is eliptical which enormously has increased the comfort of use. Despite a hefty price (consider felting board from Ashford for 39 pounds) is is a lovely thing to have, nicely balanced and well designed.


Anette herself is a very talented feltmaker. Her first book, Filz - Spiel, in a precise and clean way (very nice photography) presents a set of very simple ideas that allow to built a woolen world of tactile wonders. For instance her tactile play mat (see wonderful post by Nicola Brown, http://clasheen.wordpress.com/2009/03/25/the-completed-tactile-felt-play-mat/ contained various pleated shapes, just like this one:
 I loved the idea of felted finger puppets which she has presented in the book: here is my recreation of it. Her puppets are standing straight, whilst mine are sligtly bent because I have kept the resist up to the last minute of fulling stage.
 This book offered wonderful inspiration but limited explanation how to!
So it has very much driven me to try to figure out the ways in which such pleated shapes can be inserted into felted hats for example. The next book released last year, called Filz Experiment (available in German only) provides all answers I was looking for.
Consider this hat:

the basic shape is semi felted and then tied in as in shibori dyeing. A very nifty technique, which allows getting lasting results without too much hassle. Such tied, prefelted hat can be easilly thrown into the washing machine for 1 or 2 minutes to speed up the process. The newest book presents these techniques, and much much more. Again, a masterpiece in terms of editing and quality of the images. Unlike other books on feltmaking, usually called 34 craft project in felt (etc,.. I am referring here to a specific type of genre in general) - and which reproduce one image up to 4 times in the same book; which relentlessly describe what is obvious and which present underfelted accessories, this book is proper and certainly worth the price. Shame it is not translated into English but you can figure out the stuff for yourself from pictures. If you are going to ask me which ones to buy I would say both, but otherwise buy the second one.
Subscribe to:
Posts (Atom)


